
Using QuickBooks Online for bookkeeping comes down to six repeatable steps: set up your account and business profile, connect your bank and credit card accounts, categorize income and expenses accurately, review transactions weekly, reconcile your accounts monthly, and run key financial reports on a regular schedule. That cycle, done consistently, is what keeps your books clean and your business tax-ready year-round.
Here is what that looks like in practice:
- Set up your QuickBooks Online account with your legal business name, industry, and business structure
- Connect bank and credit card accounts so transactions download automatically instead of requiring manual entry
- Categorize every transaction using built-in or custom categories that match your actual business activity
- Review your bank feed weekly to catch uncategorized or miscategorized transactions before they pile up
- Reconcile accounts monthly by matching your QuickBooks records to your bank statements line by line
- Generate reports regularly (Profit & Loss, Balance Sheet, Cash Flow Statement) to monitor performance and prepare for taxes
QuickBooks Online automates many of the manual tasks that used to eat hours every week, but the system only works when you actually use it. The sections below walk through each step in detail, starting with the terms you need to know.
What bookkeeping terms do QuickBooks users need to know?
Before touching any settings, get clear on the vocabulary. QuickBooks uses standard accounting language throughout its menus, and misunderstanding even one term can send transactions to the wrong place.
- Assets: What your business owns. Cash, equipment, accounts receivable, and inventory all count.
- Liabilities: What your business owes. Loans, credit card balances, and unpaid vendor bills are liabilities.
- Equity: The difference between assets and liabilities. For a sole proprietor, this is essentially your ownership stake.
- Income: Revenue your business earns from selling products or services.
- Expenses: Costs you pay to run the business, from rent to software subscriptions.
- Single-entry vs. double-entry bookkeeping: Single-entry records each transaction once (like a checkbook register). Double-entry records every transaction in two accounts simultaneously, keeping the books balanced. QuickBooks uses double-entry automatically, so you get the accuracy without doing the math yourself.
- Chart of accounts: The master list of every account your business uses to categorize transactions. QuickBooks generates a starter chart based on your industry when you set up.
- Bank feed: The live connection between QuickBooks and your bank that pulls transactions in automatically each day.
- Reconciliation: The monthly process of confirming that every transaction in QuickBooks matches your actual bank or credit card statement.
- Accounts receivable (AR): Money customers owe you for invoices you have sent but not yet collected.
- Accounts payable (AP): Money you owe vendors for bills you have received but not yet paid.
- Cash vs. accrual accounting: Cash basis records income when money arrives and expenses when you pay them. Accrual records both when they are earned or incurred, regardless of when cash moves. Most small businesses start on cash basis because it is simpler and legal for businesses under the IRS revenue threshold.
How do you set up QuickBooks Online for bookkeeping?
Getting the setup right from the start saves you from painful corrections later. Work through these steps in order.
- Create your account and choose a plan. QuickBooks Online offers several tiers. Simple Start covers invoicing, expense tracking, receipt capture, and basic reports, which handles everything most solo owners need. Upgrade to Plus or Advanced only when you genuinely need features like project tracking or multi-user access.
- Enter your business details accurately. Your legal business name should match exactly what appears on your IRS paperwork. QuickBooks pulls this name onto invoices and tax forms. Select your industry carefully too, because QuickBooks builds your initial chart of accounts from that choice.
- Choose your accounting method. Pick cash or accrual during setup. You can change it later, but doing so mid-year creates headaches. Most small businesses do well on cash basis.
- Customize your chart of accounts. QuickBooks auto-populates accounts based on your industry, but review and rename the generic ones. A contractor needs "Truck Maintenance," not just "Vehicle Expenses." Keep the chart lean: 15–25 expense accounts is a practical range. Go beyond 40 and categorizing transactions becomes a chore nobody wants to do.
- Connect your bank and credit card accounts. Go to Banking (or Transactions in newer versions), click Connect Account, search for your bank, enter your credentials, and select which accounts to link. Choose a start date carefully. Beginning of the current fiscal year works well for a fresh start. Do not download years of history all at once.
- Configure invoicing and tax settings. Add your logo, set default payment terms, and turn on online payments so customers can pay directly from an invoice. Set up your sales tax settings if you collect it.
- Set user permissions. If a bookkeeper or team member will access your file, give them their own login with appropriate access levels. Sharing one login is a security risk and makes it impossible to track who changed what.
Pro Tip: Enable two-factor authentication immediately after creating your account. QuickBooks uses bank-grade encryption, but two-factor authentication is your first line of defense against unauthorized access to sensitive financial data.

What does a weekly and monthly bookkeeping workflow look like in QuickBooks?
Good bookkeeping is a repeatable accounting pipeline: capture transactions, classify them correctly, reconcile regularly, and validate results. Here is what that looks like week by week and month by month.
Daily and weekly tasks
- Review your bank feed. Transactions download automatically, but they land in a review queue waiting for your approval. Check this queue at least once a week. Three weeks of uncategorized transactions is where accuracy goes to die.
- Categorize transactions accurately. QuickBooks suggests categories based on past activity, but never accept suggestions blindly. A payment to a vendor QuickBooks has seen before might be for something entirely different this time.
- Set up recurring rules. Your monthly rent, software subscriptions, and loan payments happen the same way every month. Set up rules once and QuickBooks categorizes those transactions automatically going forward.
- Create and send invoices. Go to Sales, then Create Invoice. Select the customer, add line items, set payment terms, and email it. QuickBooks tracks what is outstanding, overdue, and paid. Turn on online payments so customers can pay by card or bank transfer directly from the invoice.
- Enter bills for vendor invoices. Use the Bills feature for vendor invoices with future due dates. This lets you track what you owe and when, which matters when you are managing cash flow across multiple vendors.
- Capture receipts with the mobile app. Photograph receipts the day you spend the money. QuickBooks extracts the details and matches them to the correct expense. The IRS expects documentation for deductions, and digital receipts stored in QuickBooks satisfy that requirement.
Monthly tasks
Monthly reconciliation is the one task you cannot skip. It catches duplicates, missing transactions, wrong amounts, and occasionally fraud.
Go to Settings, then Reconcile. Select the account, enter the ending balance from your bank statement, and check off each transaction that matches. When the difference hits zero, you are done. Reconcile every month and your books stay clean. Skip a few months and you will eventually face a correction project that takes far longer than the original reconciliation would have.
After reconciling, run your three core reports:
- Profit & Loss (P&L): Shows revenue, expenses, and net profit over a period. This answers the basic question: is the business making money?
- Balance Sheet: Shows what you own, what you owe, and your equity at a specific point in time. Every lender will ask for this before approving financing.
- Cash Flow Statement: Tracks money moving in and out across three categories: operating, investing, and financing. A business can look profitable on the P&L and still run out of cash. This report shows why.
To run any report, click Reports, find the name, pick your date range, and run it.
Pro Tip: Run Accounts Receivable Aging at month-end to see who owes you money and how long they have owed it. Anything past 90 days needs a direct follow-up call, not another email.
For small businesses managing cash flow across invoices and vendor payments, cash flow management examples can help you build the habit of reading these numbers proactively rather than reactively.
What are the best practices for DIY bookkeeping with QuickBooks?
DIY bookkeeping with QuickBooks is entirely feasible, but it requires consistent system maintenance rather than occasional data entry. The business owners who struggle are the ones who treat QuickBooks as something to catch up on every few months.
- Stick to a schedule. Weekly bank feed reviews and monthly reconciliations are not optional. Build them into your calendar the same way you would a client meeting.
- Verify every auto-categorization. QuickBooks learns from past transactions, but it is not infallible. A charge from Amazon could be office supplies, equipment, or a personal purchase that slipped through. Review each suggestion before accepting it.
- Keep your chart of accounts lean. A clear, scalable bookkeeping setup lets different team members handle transactions and still produce consistent reports. Add complexity to your chart of accounts only when you will actively use it for reporting.
- Use a checklist. Documenting daily, weekly, and monthly tasks in a simple checklist keeps your workflow consistent as your business grows and prevents tasks from falling through the cracks.
- Never mix personal and business accounts. Connect only business accounts to QuickBooks. Personal transactions mixed into business records create tax problems and make reconciliation a nightmare.
- Back up your data. QuickBooks Online stores data in the cloud, but export key reports to PDF or Excel monthly and keep copies in a separate location.
- Know when to get help. Even when you manage your own books, tasks like invoicing, paying bills, and managing accounts receivable remain your responsibility regardless of what support you bring in. If your transaction volume grows significantly or you face a complex tax situation, a certified bookkeeper or CPA is worth the cost.
- Use QuickBooks automation features. Recurring transactions, bank rules, and mobile receipt capture all reduce manual work. The goal is to spend your time reviewing and approving, not typing.
For businesses that also need to get invoicing right from the start, a solid billing and invoicing guide covers the fundamentals that feed directly into clean AR records in QuickBooks.
How much time does bookkeeping in QuickBooks actually take?
The honest answer: less than most people expect, once the system is set up and running. The time cost is front-loaded in setup and the first few weeks of building habits.
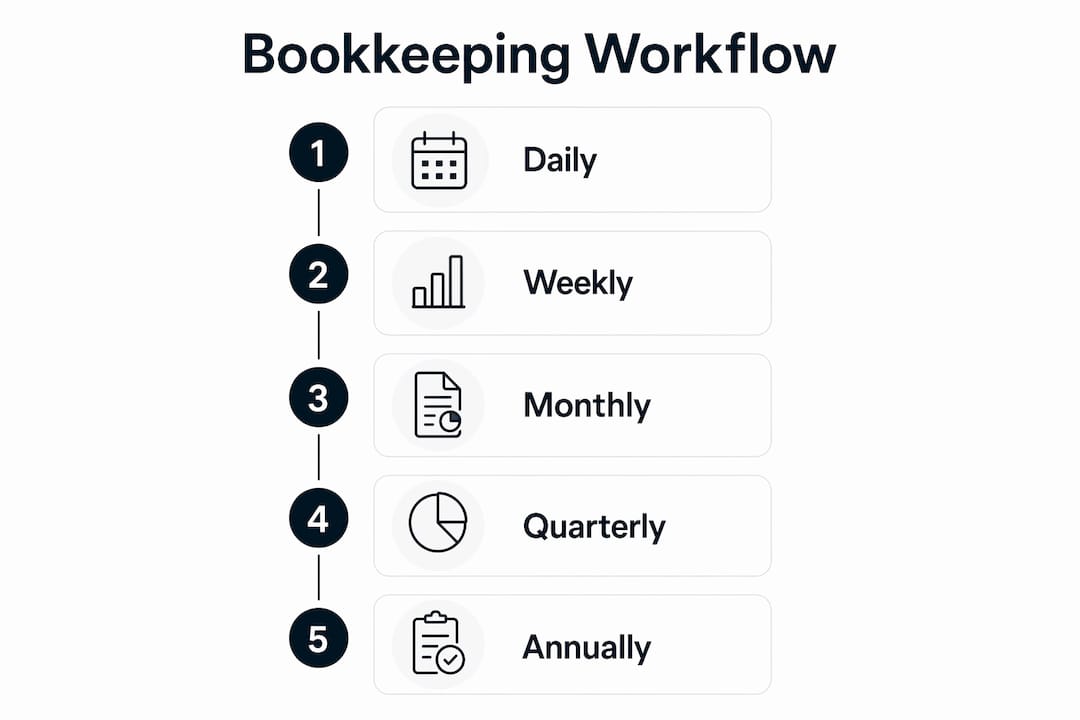
Daily (5–10 minutes): Check the bank feed queue and capture any receipts from the day. This prevents the backlog that makes weekly reviews feel overwhelming.

Weekly (20–45 minutes): Review and categorize all downloaded transactions, create or follow up on invoices, and enter any vendor bills. If you have set up recurring rules for predictable expenses, this goes faster each week.
Monthly (1–3 hours): Reconcile all bank and credit card accounts, run your core reports, review AR and AP aging, and do a quick scan for anything unusual. The first reconciliation of a new account takes longer. After that, it becomes routine.
Quarterly and annually: Review your chart of accounts for any accounts that have gone unused and clean them up. Export reports for your accountant or tax preparer. If you have been consistent month to month, tax season becomes a matter of sharing organized data rather than reconstructing records under pressure.
The businesses that spend the most time on bookkeeping are almost always the ones that let it lapse. A week of neglected transactions takes longer to sort than four weeks of 10-minute daily check-ins.
Key Takeaways
QuickBooks Online works for DIY bookkeeping when you combine a clean initial setup with a consistent weekly and monthly review cycle.
| Point | Details |
|---|---|
| Setup determines accuracy | Enter your legal business name, choose your accounting method, and keep your chart of accounts to 15–25 expense accounts from the start. |
| Bank feeds require human review | Auto-categorization saves time but is not reliable on its own; verify every transaction before accepting it. |
| Monthly reconciliation is non-negotiable | Reconciling every account each month catches duplicates, errors, and fraud before they compound. |
| Three reports tell most of the story | Profit & Loss, Balance Sheet, and Cash Flow Statement give you the financial picture you need for decisions and tax prep. |
| Time cost is manageable | Daily check-ins of 5–10 minutes and a monthly close of 1–3 hours keep books current without consuming your week. |
Take your QuickBooks books further with Peregrine
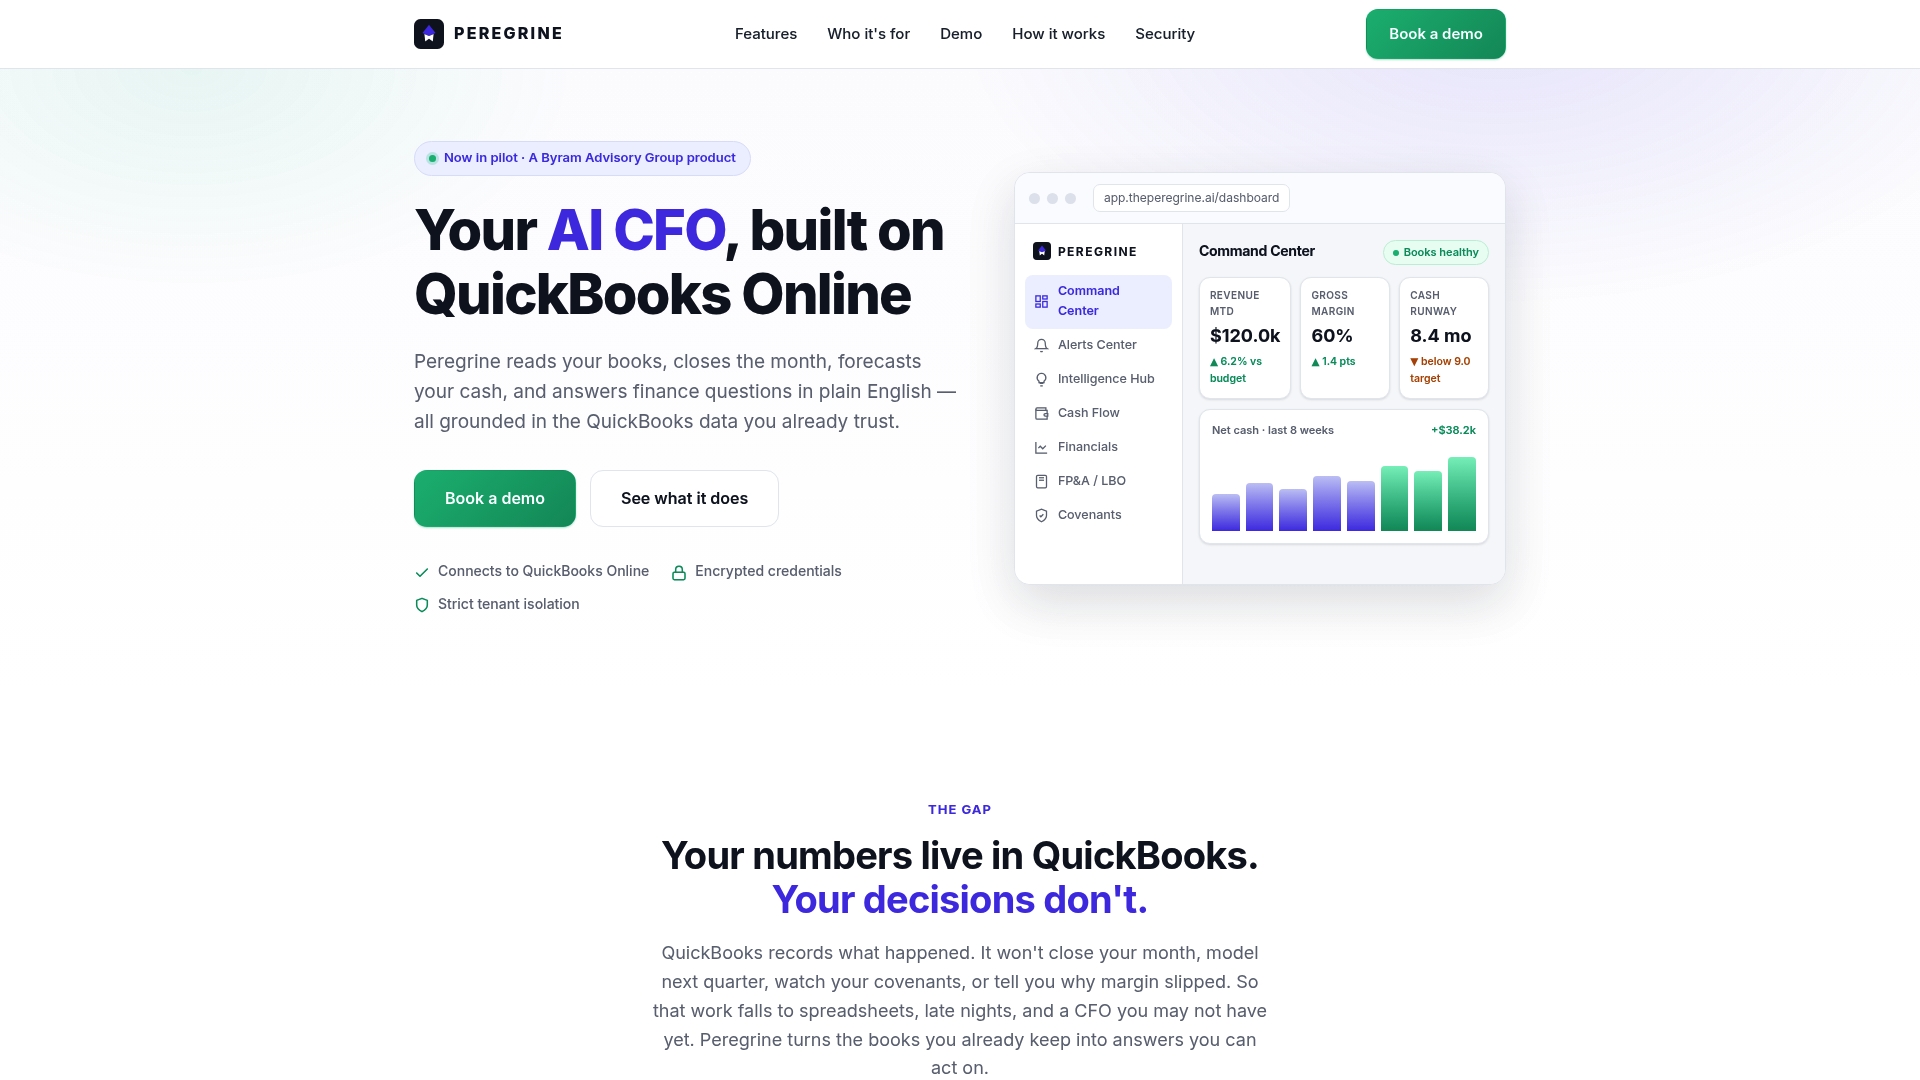
Once your QuickBooks bookkeeping is running cleanly, the next question is what to do with all that data. Peregrine connects directly to QuickBooks Online and turns your reconciled records into a real-time financial command center. It automates month-end closing, builds cash-flow forecasts, flags anomalies before they become problems, and answers plain-English financial questions without requiring you to dig through reports manually.
For business owners who have outgrown the basic dashboard but are not ready to hire a full-time CFO, Peregrine gives you CFO-grade visibility built on the books you are already maintaining. You can also follow the Peregrine implementation guide to integrate it with your existing QuickBooks setup and start getting decision-grade insights from day one.